The second we moved in I knew I wanted something in Anna’s room. Either beadboard or board and batten. I had some left over beadboard from the bathroom (don’t worry! It’s coming!!) and the EXACT amount of chair rail left over from the hall (also coming!) I couldn’t NOT do this project with 80% of it sitting in the garage. Granted I had to buy another piece of beadboard, but SO worth it. Because my math skills are what I like to call, “awesome”, I didn’t want to go through the hassle of putting anything in the bay window. Too many angles!
What you’ll need:
beadboard cut to desired height
liquid nails-about 2 tubes per 4×8 sheet of beadboard
nail gun
jigsaw (to trim around outlets and along any boards that need to be trimmed)
Miter saw (to cut the chair rail to length and to miter any corners)
router
level
desired chair rail
floorboards (optional)
Here’s what I did:
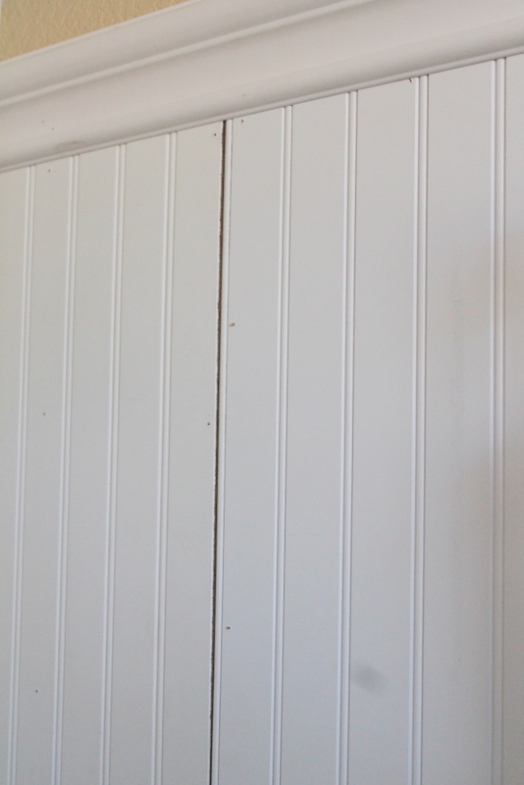
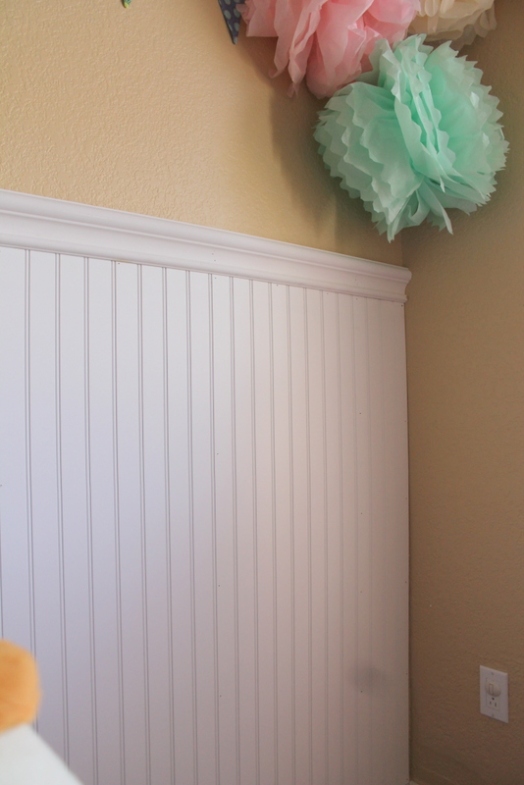
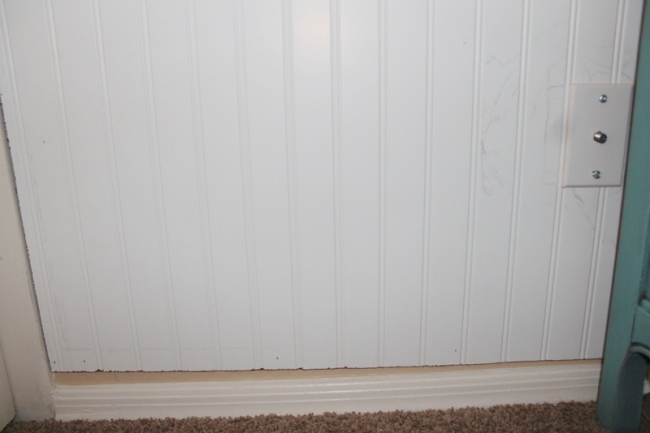
Each beadboard sheet is 4 x 8. *I wanna say I purchased the beadboard for the bathroom at Lowe’s and the extra sheet I needed at Home Depot. They are pretty much interchangeable and the price is about the same-about $20 a sheet. I had the handy people at Home Depot cut the sheet in half. (less work for me!) Once home, we placed each board flush against the floorboards to see how it fit. That way we could make adjustments as needed (and we needed too!) We placed the level on top of the beadboard and got it as close to level as we reasonable could since our floor boards and walls are a bit wonky. Once we knew it fit we marked on the wall above the board where the studs were and went ahead with the liquid nails. Using a caulking gun, I spread liquid nails across the back of the beadboard (the entire tube. Don’t be chintzy!) . I made sure to get close enough to the edges to help it hold, but not so close it would ooze out. After that we placed the board on the wall and pressed FIRMLY everywhere. Liquid nails takes awhile to dry and the beadboard tends to bow in places if it’s not secure. Now the fun part: *power tools*. I added brad nails about every 6-8 inches down each stud, and anywhere I felt it was bowing. Try not to nail anywhere you don’t have to. Yes, you’ll patch the holes, but they’ll still be slightly visible. We continued with the other pieces of beadboard until the wall was covered. Each piece is designed to fit snuggly together to continue the pattern.
Next up? Chair rail.
(I put this beadboard up before the creation of the blog so I had to improvise with some scrap wood)
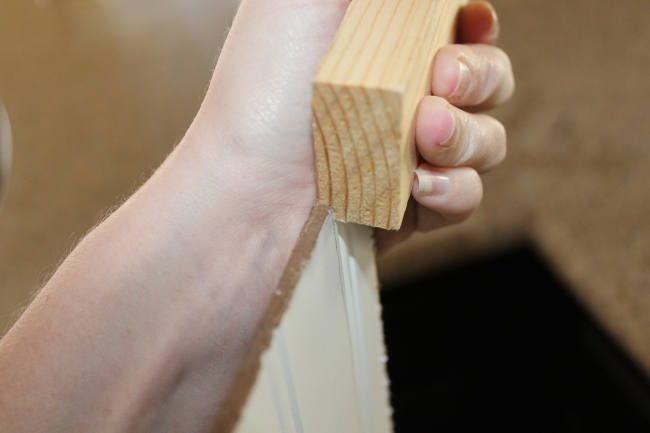
Using my AWESOME Dad’s router (you’re gonna hear a lot about him. Shout out to the old man!!), I routed an edge along the bottom of the chair rail so it fit just over the beadboard.
The idea was 1: help the beadboard stay secure to the wall, and 2: it made the seam between the chair rail and beadboard perfect.
Once we made sure the chair rail fit we used brad nails to secure it to every stud.
Now to the jigsaw
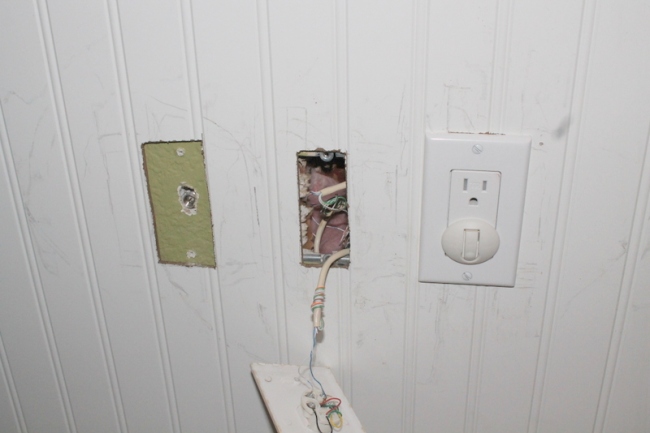
Almost every wall is going to have an outlet or something. Measuring from the top of the beadboard, and then again from the verticle seam, we marked exactly where each outlet was located. We started with smaller rectangles just to make sure we got it right. Once I drilled a hole for the blade to go through, I started cutting away. It took 4 tries but it fits perfectly! I should mention why the beadboard looks so dirty. The jigsaw makes all sorts of marks on the board, but it doesn’t ding it, and the paint completely covers it.
Now our house’s dirty little secret…
Our house is OLD, so there isn’t a level and square wall in sight. The middle sheet of beadboard had to be cut away at the bottom to make do for a bowed floor board, but the end piece was in a completely different ballpark. There was no way I could have made that piece work without making the entire piece slant. Solution? New floorboards (yay!!). I had debated before starting the project about replacing them because they’re different from the rest of the house. I didn’t want to go to the extra expense, but now it’s a necessity.
PHASE 2 checklist:
fill in all seams with painters caulk
spackle over all the nail holes then sand
PAINT!!!
*start construction on bay window seat with storage*
I’M EXCITED!
See where this post likes to party!
- The Sunday Showcase by Stephanie Lynn
- Craft-O- Maniac
- DIY Show off
- Coastal Charm
- Skip to my Lou
- Hope Studios
- A Stroll Thru Life
- Brambleberry Cottage
- Tidy Mom
- Chic on a Shoestring
- The Shabby Nest
- Craft Dictator
- Not Just a Housewife
- Ginger Snap Crafts
- Fluster Buster
- Tater Tots and Jello
- Little House in the Suburbs
- The Romantic Home
- My 1929 Charmer
- Nifty Thrifty Things
- Domestically Speaking
- Savvy Southern Style


Love it! Great instructions! I’ve been wanting to do the same thing in my girl’s bedroom for years. . You made me want to finally do it.
LikeLike
I love it!!! You make it look so easy!
LikeLike
Hoping you link us up too! I love this tutorial and have been debating doing board and batten in our hallway 0.4 seconds after we moved in. Stopping by from the Merry Monday linky party! Thanks for sharing! -Treana @ houseofbennetts.com
LikeLike
Thanks Treanah! Somehow I missed linking to your party…I added the party button. Thanks for having me!
LikeLike
Of course! That happens to me ALL the time! Good luck on phase two. You’ll rock it!
LikeLike
Very adorable! I would love it if you joined and contribute your awesome posts at my link party at City of Creative Dreams, starts on Fridays 😀 Hope to see you there at City of Creative Dreams Link Party.
LikeLike
That quilt is gorgeous. Thanks for sharing. Hello from Craft Frenzy Friday!
LikeLike
Thank you! I actually made it for her a few yrs ago. It was my first, and only, quilt.
LikeLike
Thank you for sharing this post at City of Creative Dream’s City of Links on Friday! I appreciate you taking the time to party with me. Hope to see you again this week 🙂
LikeLike